

Building Fero, an autonomous fire-extinguishing bot
Story of how we built a partly working bot in 2 weeks


When semesters are about to close, we quickly run out of time to finish everything up. As part of our developmental engineering project, we needed to build something from the ground up. We chose to make an autonomous fire-extinguishing bot.
The plan, the bot and the tweak
The complete plan was to make a bot that automatically detects a fire, goes up to it and extinguishes it. There were a few compromises, but we were almost there.
For the chassis, we used a Tetrix kit, because we had many kits just lying around in the lab with no one using them. The most important part next is to decide what sensors and actuators to use.
For sensing the fire we used Panasonic's AMG8833. It's an infrared array sensor that outputs an 8x8 heatmap of the area in front of the sensor.
For the arm movement, we initially wanted to use a stepper motor with a high holding torque (and use a bulkier arm). In the Tetrix kit, however, we found some light tubes, which were the perfect arm material, so just decided to go with servo motors that already came with the kit. It ultimately helped us, since servos are feedback controlled...so we could just specify angles to which orient the arm instead of using external feedback in case we had used stepper motors. You can see the final arm movement here.
Another servo motor (a last-minute addition) was used in the extinguishing mechanism. We used a pulley and thread system to lower a vial (containing concentrated sulphuric acid) into a solution of sodium bicarbonate (which together form a soda-acid fire extinguisher).
For driving the body we used DC motors with an L293D driver with a LiPo external battery just for the two motors. So the 3 servo motors (2 for the arm, 1 for the pulley system), the control line of the wheel driver and the AMG8833 thermal camera were all powered via a single power line straight from the Arduino.
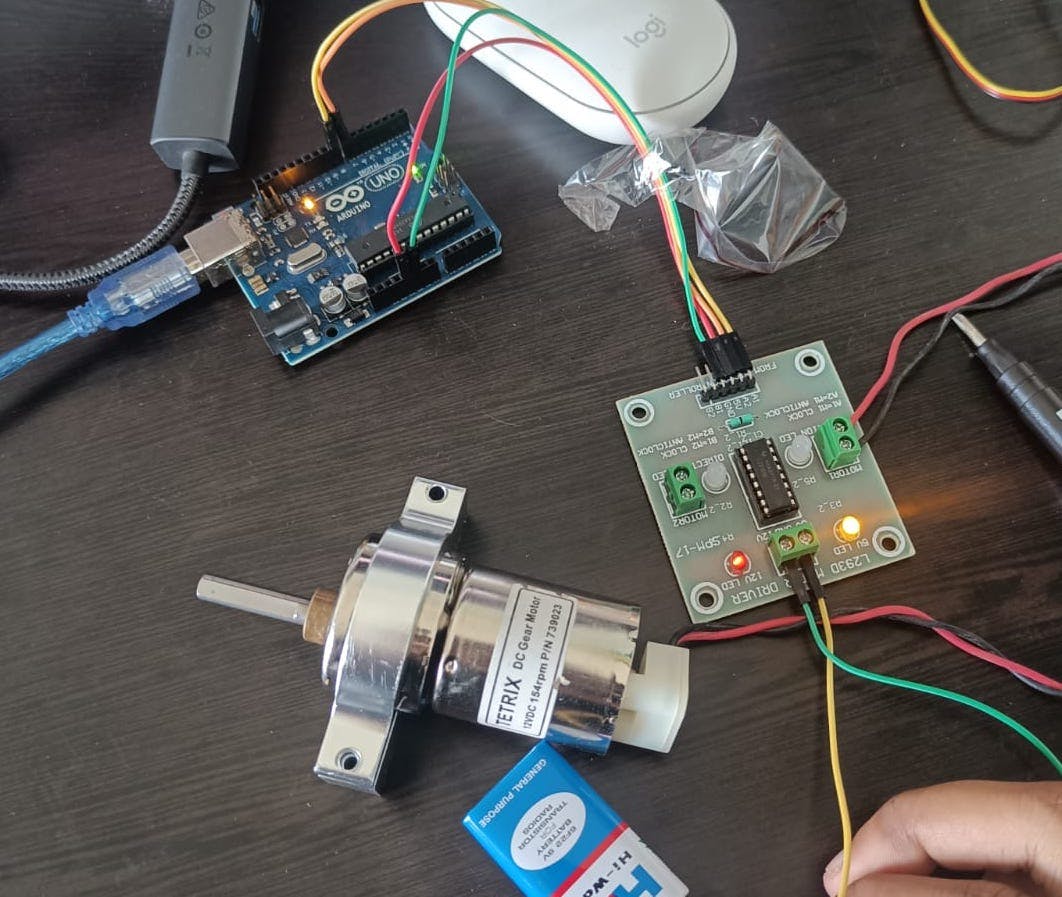
To simplify the circuit, we just used a thin strip of a breadboard for power distribution for the low-voltage devices. Everything else was directly connected to the Arduino, instead of passing them through a breadboard. That reduced a lot of overhead clutter, even though the final wiring turned out to be very messy.
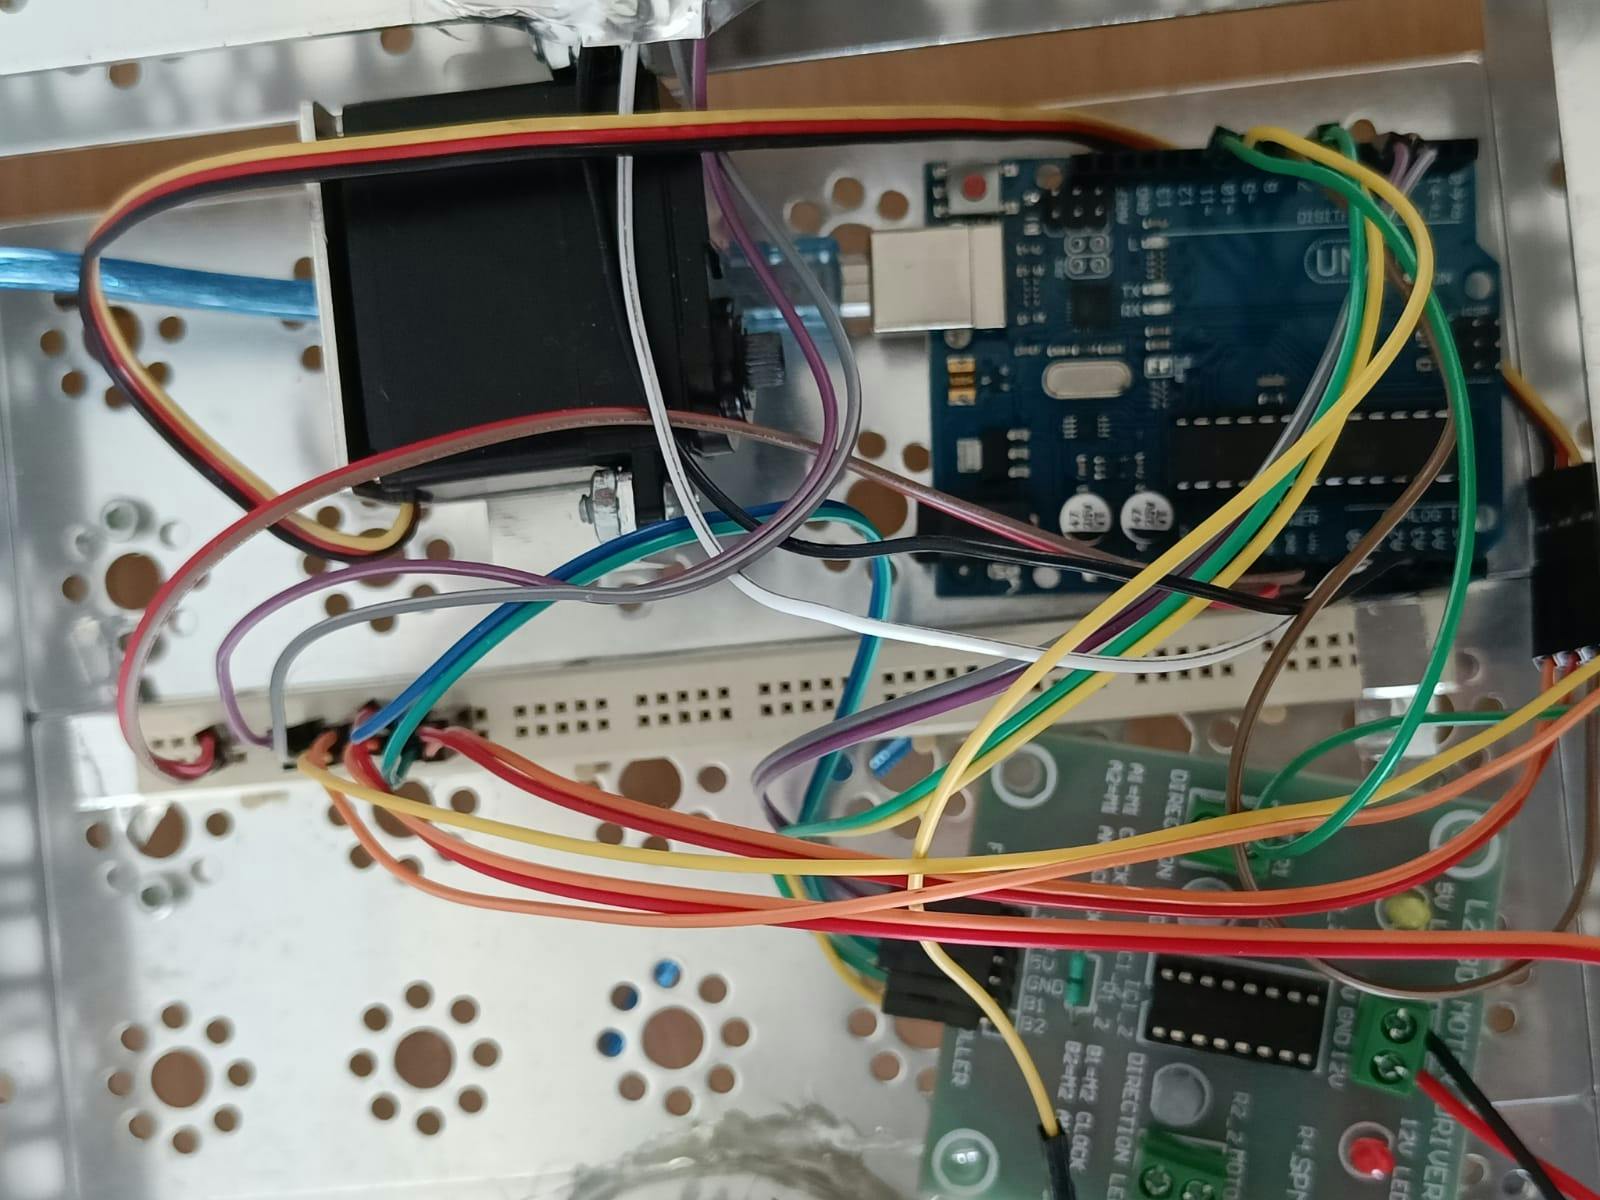
In this pic, it's seen how the 5V and GND from the Arduino are connected at the very left, and distributed over to the 3 servos, the AMG8833 and Vin and GND of the L293D.
With the basic structure set, the next part is to code the inputs and mechanisms so that all of these individual components work together.
The 2 main subsystems
We divided the goal of the bot into 2 parts:
Going to the fire (detection and sensing-based movement)
Extinguishing the fire (extending the arm and triggering the reaction)
Going to the fire
For going to the fire, we need the data from the thermal sensor. It outputs data in a 64-byte array (8x8 grid) in Celsius values. However, the range turned out to be pretty low, so it could only detect temperatures close to the sensor. That works though, since it's just a proof-of-concept.
While we wanted to do with a real fire, we settled for the inverse (i.e. cold water in a bottle) since lighting a fire just for testing might be a hazard.
float* readTemps() {
  static float temps[3];
  // Read temperature values from sensor
  amg.readPixels(pixels);
  temps[0] = temps[1] = temps[2] = 100;

  for(int i=0; i<AMG88xx_PIXEL_ARRAY_SIZE; i++){
    if (i%8 < 2) {
      if (pixels[i] < temps[0]) temps[0] = pixels[i];
    } else if (i%8 > 5) {
      if (pixels[i] < temps[2]) temps[2] = pixels[i];
    } else {
      if (pixels[i] < temps[1]) temps[1] = pixels[i];
    }
  }
  return temps;
}
Since the chassis needs to be rotated either left or right, we are dividing the sensor grid into zones: left, centre and right. In the code, we are computing max temperatures for each zone (note it's an 8x8 grid, hence the modulo by 8). This function returns an array of 3 numbers, the temperature values for left, centre and right. This is fed into a function called getDirection which is a parser that outputs which direction to rotate in, as one of 4 characters, denoting centre, right, left or none. Since we are dealing with coldness rather than hotness for testing we write a complimentary function called getDirectionInv which outputs which region has a cold object rather than a hot one.
char getDirectionInv(float values[3]) {
  float leftAvg = (values[0] + values[1]) / 2.0; // compute average of left values
  float rightAvg = (values[1] + values[2]) / 2.0; // compute average of right values
//  return 'c';
  if (values[1] < 20 || (values[1] < (values[0] - 5.0) && values[1] < (values[2] - 5.0))) {
    return 'c';
  } else if (values[2] < 20 || values[2] < (leftAvg - 5.0)) { // right is significantly lower than left and center
    return 'r';
  } else if (values[0] < 20 || values[0] < (rightAvg - 5.0)) { // left is significantly lower than right and center
    return 'l';
  } else { // center is the lowest or values are not significantly different
    return 'n';
  }
}
As seen, this doesn't simply output the zone with the least temperature, since in the array [30, 31, 32] (for example) it would output left with that logic, even though there's no cold object, as can be concluded from the values).
This function flags a zone as cold if it either is less than 20 degrees or at least 5 degrees less than the average of the other 2 zones. We first check for the centre because in the event the cold object is right ahead (which might span both the centre and left or right zone), we get the signal to move forward instead of left or right.
This information is sufficient to drive the motor in the necessary direction. But how to continually keep checking the temperatures and turning based on the output? We make a loop that does just that by rotating the motor by a very little angle each time.
// Function to rotate motor (just a little) in appropriate direction based on input value
void justRotateMotor(char direction) {
  Serial.print("Rotating ");
  if (direction == 'l') { // rotate counterclockwise for 'l'
    Serial.println("left");
    digitalWrite(P1B,HIGH);
    digitalWrite(P2B,LOW);
  } else if (direction == 'r') { // rotate clockwise for 'r'
    Serial.println("right");
    digitalWrite(P1A,HIGH);
    digitalWrite(P2A,LOW);
  } else if (direction == 'c') { // drive both motors for a moment for 'c'
    Serial.println("fwd");
    digitalWrite(P1A,HIGH);
    digitalWrite(P1B,HIGH);
  } else { // do not rotate for any other input
    Serial.println("none");
    return;
  }

  delay(200); // rotate/drive for 200ms
  digitalWrite(P1A,LOW);
  digitalWrite(P1B,LOW);
}
So, when the fire is on the left, it receives 'l', rotates left (by switching on the right motor for 200ms). In case it exceeds the motion by rotating too much it receives 'r' next (again, the on-time of the motor is 200ms). When it gets 'c' it drives forward, again by 200ms. This incremental movement ensures it keeps moving towards the target, even if by little bits, each time.
This is a demo showing the thermal camera detecting cold water and directing the wheels to move in that direction. It's kinda jerky, but it would be better if we switch the wheels on for 100ms instead of 200, and add some more delay in the program loop.
Extinguishing the fire
Now when it reaches the target, it needs to position the arm to point towards the fire, and then trigger the soda-acid reaction by lowering the vial of acid into the base solution inside the bottle.
For this, we used a glass bottle, with 2 holes on the lid (one to pass the thread through and another to carry out the reaction results). For dropping the thread, we used a servo motor. As it rotated from 0 through 180 degrees, the thread tied around its axis unwound to lower the vial. This mechanism was triggered right after the arm was positioned.
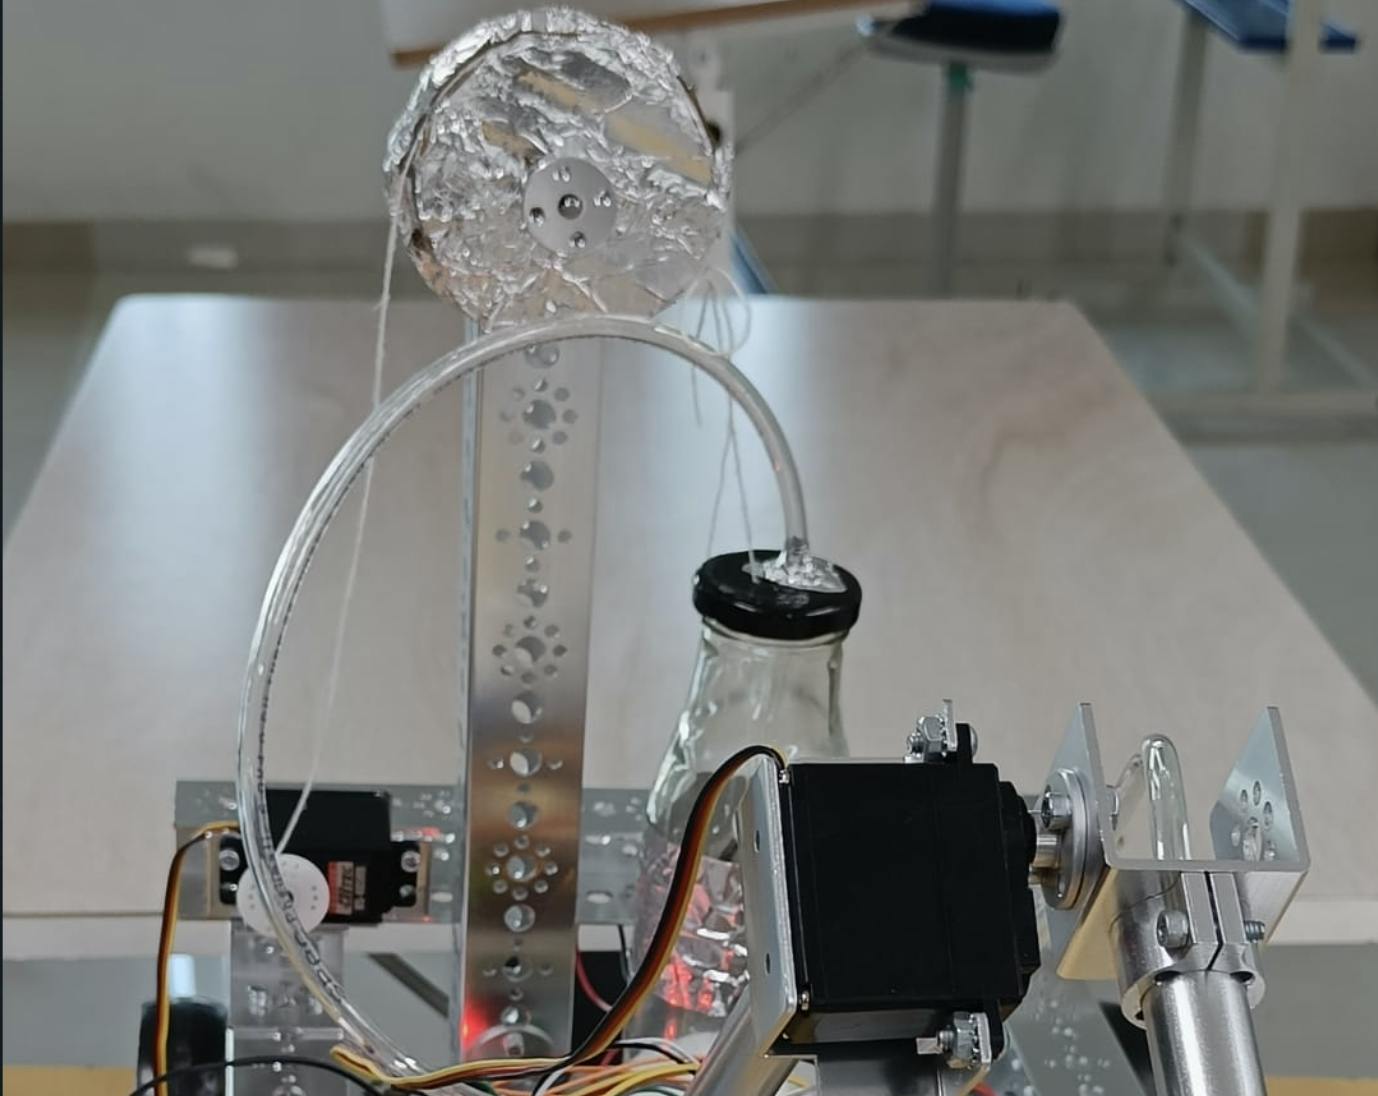
This shows the pulley with the thread, from being wound up to the servo at one end and going into the bottle at the other. The thread inside the bottle is tied to a vial of concentrated sulphuric acid.
For positioning the arm, the goal was to use the thermal sensor data (now dividing the grid by rows, instead of by columns) to get the vertical position of the fire. However, this required some testing. Since we were pressed for time we hardcoded the angle values by which to rotate to assume a fixed position to point at a fire.
We had to keep in mind that the servos were small, hence not extremely powerful. The base servo had to bear the weight of not only the 2 arms but also of the servo attached in the link between the 2 arms and also the bending forces on the tube which was passing through the arm that was attached to the base arm. So if the centre of mass passed a certain point, the base servo could not hold it up. So we had to keep the resting position of the second arm as close to the ground (when the base arm is moving), and also restrict the movement of the base arm to a range of angles.
This shows how the arm cannot hold the weight of the entire assembly beyond a certain angle.
servoEnd.write(160);
servoBase.write(0);
delay(1000);

// base action
for (posBase = 0; posBase <= 50; posBase += 1) {
  // pos cannot go beyond 180
  Serial.println(posBase);
  servoBase.write(posBase);
  delay(50);
}
// delay(1000);

// end action
for (posEnd = 160; posEnd >= 0; posEnd -= 1) {
  // pos cannot go beyond 180
  Serial.println(posEnd);
  servoEnd.write(posEnd);
  delay(20);
}

for (posEjector = 0; posEjector <= 180; posEjector += 1) {
  // pos cannot go beyond 180
  // Serial.println(servoEjector);
  servoEjector.write(posEjector);
  delay(20);
}
Here base is the first arm (link), attached to the chassis. End is the second arm (link) attached to the base. Ejector refers to the servo controlling the vial and reaction mechanism.
In the initial positions (160 degrees and 0 degrees for the end and base values respectively), the arm assumes an inverted V position, keeping it stable. The base rotates through 50 degrees (0 to 50, to avoid a situation where the base servo is overpowered) and the end through 160 degrees (160 to 0, to prevent the arm from banging against the tabletop). Then the ejector does its thing.
while (posEnd < 160) {
  posEnd += 1;
  servoEnd.write(posEnd);
  delay(20);
}
while (posBase > 0) {
  posBase -= 1;
  servoBase.write(posBase);
  delay(20);
}
while (posEjector > 0) {
  posEjector -= 1;
  servoEjector.write(posEjector);
  delay(20);
}
This is the position reversal for the 3 servos after the fire has been extinguished.
Here's the final result of how the arm is working. At the very end, you can see the pulley is rotating a bit.
Wrapping it up
Our initial plan was to make it completely autonomous, and we already are a long way there. The one thing remaining is to join the 2 subsystems. To put it simply, we need to decide where the wheel movement stops and the arm movement starts. Two simple approaches could include:
Set a threshold for temperature, crossing which leads to the bot stopping and initiating the arm and pulley mechanism
Stop the bot when the fire (a set threshold) spans all the 3 zones (left, centre, right) and then start the arm
We learnt many new things and had a lot of fun. If proceed further in developing it, there are a lot of improvements remaining in this to make it autonomous and functional. I hope someday we can find time for another such project.
Thanks and resources
Thanks to my team members Ankita, Devayani and Sudarshan.
Here is the code for everything on my GitHub.